Business Headshots with a Smartphone: The No-Excuses Guide
A strong business headshot boosts trust, clicks, and opportunities. The good news: you don’t need a DSLR or an expensive studio. With a little planning, even an older smartphone can produce a clean, professional headshot you’ll be proud to use on LinkedIn, your website, or your email signature.
Below is a step-by-step playbook to get it right, plus a simple shortcut if you want multiple polished looks in minutes.
Full transparency: We offer a service that allows you to generate professional, high-quality business headshots with help of AI.
It only takes one input photo and a few seconds to generate your very own headshots with our service. We offer lots of configuration options, refunds if you're not happy and you can get started for as little as $5.99.
Can Your Smartphone Really Handle It?
Yes. Phone cameras from the last 6–8 years can capture sharp, flattering portraits. The biggest difference-maker isn’t the sensor—it’s your lighting, distance, and background.
- Use the rear camera for higher quality.
- If you have portrait mode, try it—but good lighting always matters more than software blur.
- Stabilize the phone to avoid motion blur.
Before You Shoot: Prep in 10 Minutes
A little preparation saves time and retakes.
- Wardrobe: Solid colors work best. A blazer or structured top photographs well. Avoid tiny stripes or loud patterns.
- Grooming: Tame flyaways, blot shine, and check your collar. Keep accessories simple.
- Background: Choose a clean wall, a lightly textured space, or a softly blurred room. Remove clutter within the frame.
- Timing: Shoot in daylight. Morning or late afternoon gives softer light.
Lighting That Flatters (Even Indoors)
Natural light is your best friend. Aim for soft, directional light that molds your features without harsh shadows.
- Stand 2–3 feet from a bright window with indirect light. Face the window at a slight angle (about 30–45 degrees).
- If sunlight is direct, use a sheer curtain or move farther back to soften it.
- Turn off overhead lights (they cause unflattering shadows under the eyes).
- Outdoors? Find open shade—like under a porch or on the shadow side of a building.
Pro tip: The “car studio.” Sit in the front seat facing out, parked in open shade. Car interiors can act like a softbox, producing even, flattering light.
Composition and Framing
Small tweaks in position make a big difference.
- Camera height: Keep the lens at eye level. Looking up or down distorts features.
- Distance: Step back 4–6 feet and use 2x (telephoto or digital zoom). This reduces wide-angle distortion.
- Crop: Aim for chest-up to just above the head. Leave a little space above your hair.
- Gridlines: Turn them on. Place your eyes along the top third for a balanced crop.
Posing tips:
- Turn your body 10–20 degrees from the camera and slightly turn your head back toward it.
- Drop your shoulders, elongate your spine, and gently push your chin forward and down (micro-movement that defines the jawline).
- Expression: Think “friendly confidence.” Breathe out, then smile with your eyes.
Backgrounds That Look Professional
Keep it simple and intentional.
- Neutral wall: Gray, beige, or off-white is clean and timeless.
- Office environment: Shelves, plants, or abstract art in soft blur adds context.
- Outdoor background: A wall, foliage, or city texture looks great if out of focus.
Avoid busy patterns, messy spaces, and bright colors that reflect onto your skin.
Camera Settings That Help
Don’t overthink it—just a few switches can elevate quality.
- Clean the lens. It’s the easiest “upgrade.”
- Rear camera: Use it over the selfie cam for better detail.
- Focus and exposure: Tap on your face to focus. Slide exposure down slightly to avoid blown highlights.
- HDR: Useful in mixed light—turn it on if your face is too dark against a bright background.
- Timer or remote: Use a 3–10s timer to avoid camera shake. A cheap Bluetooth remote works too.
- Filters: Skip beauty filters. They can look unnatural.
Shooting Solo vs. With a Friend
If you’re solo:
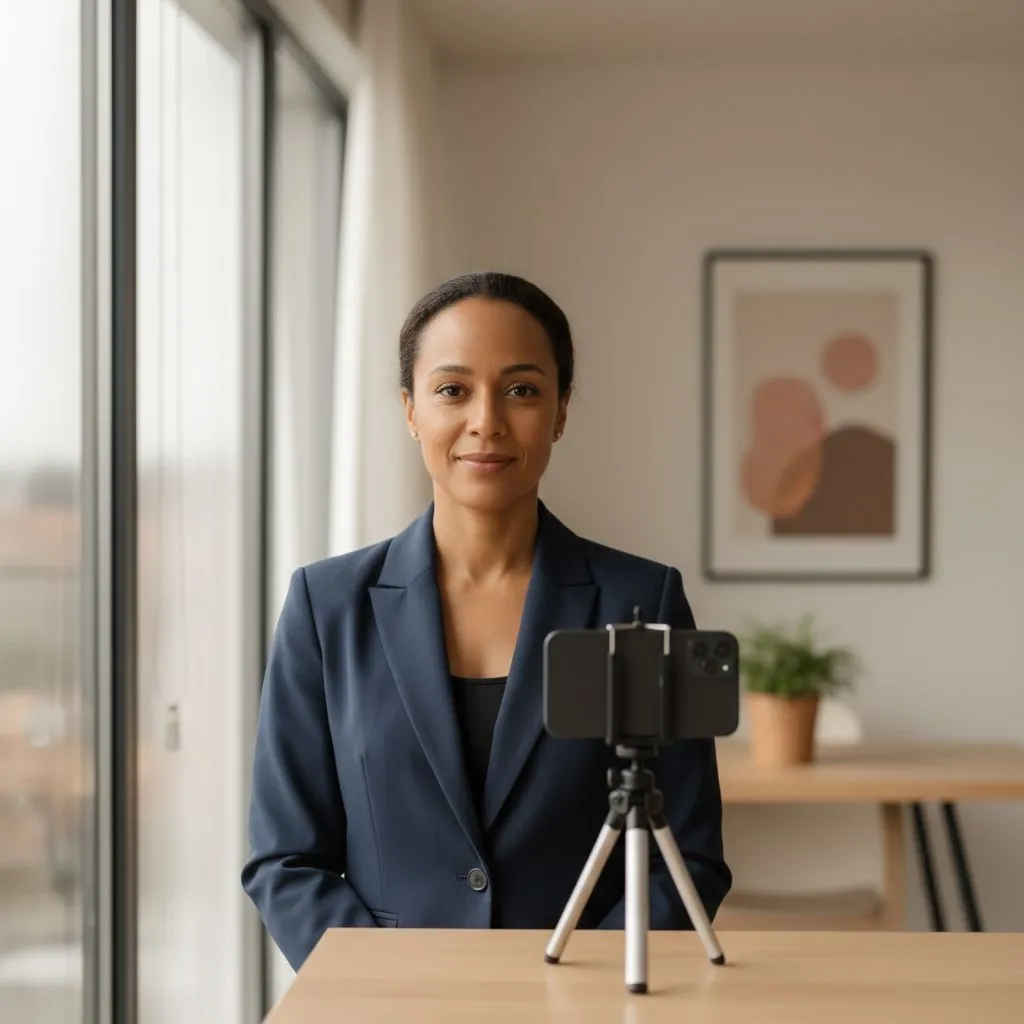
- Prop your phone at eye level using a tripod, stack of books, or a stable shelf.
- Use the rear camera with your smartwatch or remote to trigger the shutter.
- Record a short video while you pose and then export the best still frames in high resolution.
If you have help:
- Ask for small adjustments: shoulder angle, hair, collar symmetry, posture.
- Shoot 20–30 frames so you can choose the best expression and posture.
Quick, Clean Editing
Keep edits subtle and professional.
- Crop: For LinkedIn profile photos, a square crop (1:1) works well. Keep your eyes in the top third.
- Exposure and color: Add a touch of contrast, reduce highlights, and warm or cool slightly for natural skin tones.
- Retouching: Remove temporary blemishes and dust. Avoid heavy skin smoothing or eye whitening.
- Sharpening: Apply modest sharpening; overdoing it adds noise.
Common Mistakes to Avoid
- Standing too close to the camera, causing distortion.
- Overhead lighting and raccoon-eye shadows.
- Busy or cluttered backgrounds.
- Over-saturated filters and heavy skin blurs.
- Wearing reflective glasses without angling your head slightly to reduce glare.
Want Multiple Studio-Quality Looks Fast?
If you need several consistent, professional headshots—different outfits, backgrounds, and poses—doing it manually can be time-consuming. That’s where AI can help.
With AI Business Headshots, you upload just a photo of yourself, choose attire, poses, and backgrounds, and receive studio-quality headshots in seconds. It’s ideal for:
- Fast LinkedIn refreshes or press kits.
- Matching your company’s visual style across your team.
- Getting formal, casual, and brand-specific options without multiple shoots.
Loading demo video...
See how AI-generated headshots work in seconds
Prefer to start with a DIY capture and then upscale the results? Snap a simple, well-lit photo by a window and feed it into our service. You’ll get clean, consistent, on-brand images without renting lights or buying backdrops.
Real-World Example
Maria had an older iPhone 8 and no tripod. She faced a bright window, propped the phone on stacked books at eye level, and used the 3-second timer. She stood 5 feet away, angled her body, and tapped to focus on her face.
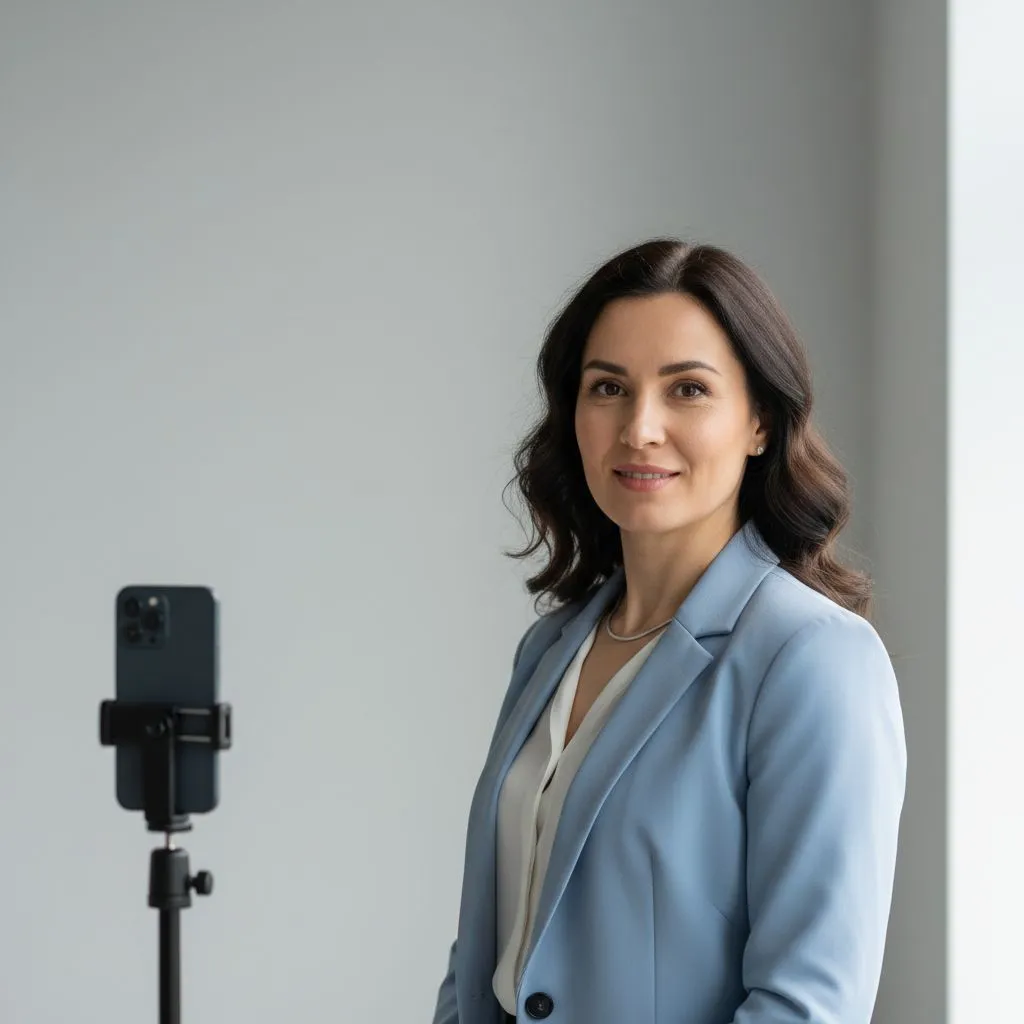
Her results were clean and professional. Later, she used AI Business Headshots to instantly create several variations—a navy blazer on a light gray studio background for LinkedIn, a softer lifestyle shot for her website, and a high-contrast, black background look for speaking engagements.
Budget-Friendly Extras (Optional)
These small purchases can make shooting easier, but they’re not required.
- Mini tripod or phone clamp
- Bluetooth shutter remote
- Sheer curtain for window diffusion
- Lint roller and blotting papers
Final Checklist
- Lighting: Soft, indirect window light; overhead lights off.
- Camera: Rear camera, eye level, 2x zoom, timer on.
- Background: Clean, simple, slightly blurred if possible.
- Pose: Body angled, shoulders relaxed, chin slightly forward and down.
- Expression: Warm and confident.
- Edit: Subtle crop, exposure, and color tweaks; minimal retouching.
Wrap-Up
You can absolutely create a polished business headshot with any modern smartphone, including older models. Focus on light, distance, and a clean background, and you’ll outperform most rushed studio walk-ins.
If you want multiple professional looks in seconds—or a consistent company-wide set—try AI Business Headshots. Upload a photo, pick your style, and let AI deliver ready-to-use headshots that look like you at your best.
Full transparency: We offer a service that allows you to generate professional, high-quality business headshots with help of AI.
It only takes one input photo and a few seconds to generate your very own headshots with our service. We offer lots of configuration options, refunds if you're not happy and you can get started for as little as $5.99.